Deploying OpenClaw on Cloudflare
This guide covers the deployment model used by cloudflare/moltworker. OpenClaw runs inside a Cloudflare Sandbox container behind a Worker. It is not a D1-and-Queues deployment.
Cloudflare’s own docs line up with that model: container deployments are configured in wrangler.jsonc via containers, a matching Durable Object binding and migration, optional r2_buckets, and triggers.crons.
Experimental: The
moltworkerrepo is a proof of concept, not an officially supported OpenClaw deployment target. Expect rough edges.
Looking for multi-tenant? If you need to run OpenClaw as a service for multiple users, see the openclaw-aaas example.
What you are deploying
- A Cloudflare Worker that fronts OpenClaw
- A Cloudflare Sandbox container built from
Dockerfile - A
SandboxDurable Object that controls the container lifecycle - Optional R2-based backup/restore persistence
- Cloudflare Access in front of the admin UI
- A cron trigger that can wake the container before scheduled jobs run
In the moltworker repo, this shows up directly in wrangler.jsonc:
containerspoints at./Dockerfiledurable_objectsbinds theSandboxclassmigrationscreates the SQLite-backed Durable Object classr2_bucketsbindsBACKUP_BUCKETtriggers.cronsruns every minute
Prerequisites
- Cloudflare account on the Workers Paid plan
- Cloudflare Containers / Sandbox enabled for the account
wranglerinstalled:npm install -g wrangler- Logged in with
wrangler login - An Anthropic API key, or Cloudflare AI Gateway plus an upstream provider key
- Comfort with Wrangler, secrets, and Cloudflare Access
Cost: This is not a cheap edge-only Worker deployment. The moltworker README estimates about $34.50/month for a standard-1 container running 24/7, or about $10-11/month if you let it sleep aggressively when idle.
1. Clone the reference repo
git clone https://github.com/cloudflare/moltworker.git
cd moltworker
npm install
The repo’s deploy script is simply:
npm run deploywhich runs npm run build && wrangler deploy.
2. Set the required secrets
You need one AI provider path and one gateway token.
Direct Anthropic access
npx wrangler secret put ANTHROPIC_API_KEYOr Cloudflare AI Gateway
npx wrangler secret put CLOUDFLARE_AI_GATEWAY_API_KEY
npx wrangler secret put CF_AI_GATEWAY_ACCOUNT_ID
npx wrangler secret put CF_AI_GATEWAY_GATEWAY_ID
If AI Gateway is configured, moltworker uses it in preference to direct ANTHROPIC_API_KEY or OPENAI_API_KEY.
Gateway token for remote access
export MOLTBOT_GATEWAY_TOKEN=$(openssl rand -hex 32)
echo "Your gateway token: $MOLTBOT_GATEWAY_TOKEN"
echo "$MOLTBOT_GATEWAY_TOKEN" | npx wrangler secret put MOLTBOT_GATEWAY_TOKEN
Save that token. You will need it to access the Control UI.
3. Deploy the Worker and container
npm run deployAfter deploy, your Control UI will be available at:
https://your-worker.workers.dev/?token=YOUR_GATEWAY_TOKENReplace your-worker with your actual worker name and YOUR_GATEWAY_TOKEN with the value you generated.
Note: The first request may take 1-2 minutes while the container starts.
4. Protect the admin UI with Cloudflare Access
The moltworker admin UI lives at /_admin/. The repo expects you to protect it with Cloudflare Access and then give the worker enough information to validate Access JWTs.
Enable Access on the Worker
The simplest path is the built-in workers.dev Access integration:
-
Open Workers & Pages in the Cloudflare dashboard.
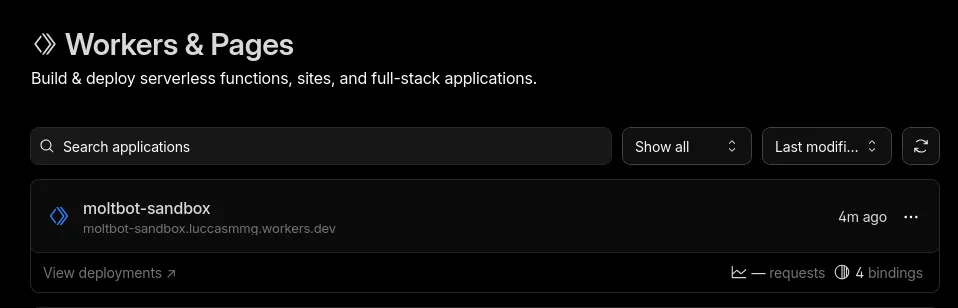
-
Select your Worker.
-
Go to Settings > Domains & Routes.
-
In the
workers.devrow, open the...menu and enable Cloudflare Access.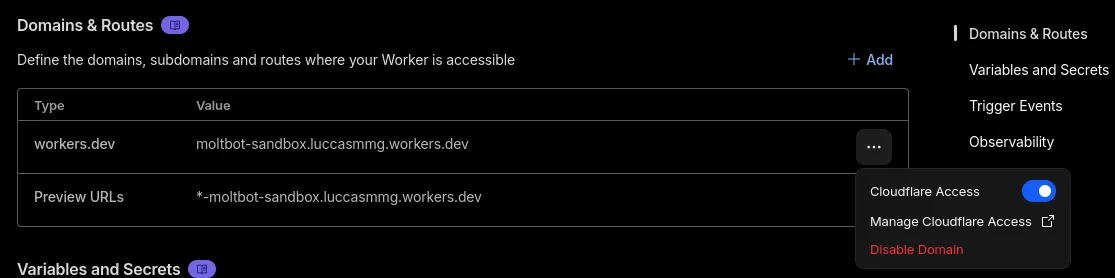
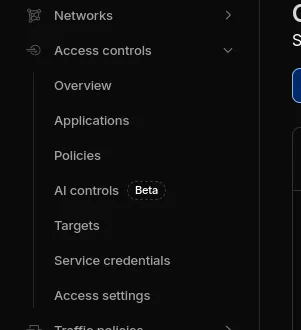
-
Go to Zero Trust > Access controls > Applications
-
Copy the application’s Audience tag (
AUD).


Set the Access secrets
npx wrangler secret put CF_ACCESS_TEAM_DOMAIN
npx wrangler secret put CF_ACCESS_AUDCF_ACCESS_TEAM_DOMAINlooks like{your username}.cloudflareaccess.comCF_ACCESS_AUDis the audience tag from the Access application
Redeploy after adding Access secrets
npm run deployAfter that, visiting /_admin/ should prompt you to authenticate through Cloudflare Access.
5. Pair your first device
moltworker uses device pairing by default.
- Open the Control UI with
?token=YOUR_GATEWAY_TOKEN. - In another tab, open
https://your-worker.workers.dev/_admin/. - Sign in through Cloudflare Access.
- Approve the pending device pairing request.
The gateway token alone is not enough for a new device. The repo requires explicit approval through the admin UI.
6. Add persistence with R2
By default, data inside the container is ephemeral. If the container restarts, paired devices, configs, and conversation history are lost unless you configure R2.
Create an R2 API token
According to the moltworker README, the default bucket is moltbot-data. Create an R2 API token with Object Read & Write permissions for that bucket.
Set the R2 secrets
npx wrangler secret put R2_ACCESS_KEY_ID
npx wrangler secret put R2_SECRET_ACCESS_KEY
npx wrangler secret put CF_ACCOUNT_ID
If you are using a custom bucket name, also set:
npx wrangler secret put BACKUP_BUCKET_NAMERedeploy
npm run deployHow persistence works
The repo uses a backup/restore model rather than a live mounted database:
- On startup, the container restores backup data from R2 if it exists.
- During normal operation, a cron job syncs config data back to R2 every 5 minutes.
- The admin UI exposes backup status and a manual Backup Now action.
7. Tune container sleep behavior
By default, SANDBOX_SLEEP_AFTER=never, which avoids repeated cold starts but costs more.
To let the container sleep when idle:
npx wrangler secret put SANDBOX_SLEEP_AFTERExample values: 10m, 30m, 1h.
Trade-off:
- Lower cost when idle
- 1-2 minute cold starts when the container wakes up again
8. Optional extras
Chat channels
Set the relevant secrets and redeploy:
npx wrangler secret put TELEGRAM_BOT_TOKEN
npx wrangler secret put DISCORD_BOT_TOKEN
npx wrangler secret put SLACK_BOT_TOKEN
npx wrangler secret put SLACK_APP_TOKEN
npm run deploy
Browser automation
For the built-in CDP shim:
npx wrangler secret put CDP_SECRET
npx wrangler secret put WORKER_URL
npm run deploy
Verifying the deployment
- Open
https://your-worker.workers.dev/?token=YOUR_GATEWAY_TOKEN - Confirm the Control UI loads after the container starts
- Open
/_admin/and confirm Cloudflare Access is enforced - Confirm your device appears under paired devices
- If R2 is configured, confirm the admin UI shows backup status
- Use
npx wrangler tailto inspect logs if startup looks wrong
Common issues
npm run dev fails with Unauthorized
Cloudflare Containers are not enabled for your account yet. Enable them in the Containers dashboard.
Admin routes return access denied
Check CF_ACCESS_TEAM_DOMAIN, CF_ACCESS_AUD, and your Access policy.
Slow first request This is expected. Cold starts can take 1-2 minutes.
R2 persistence is not working
Check that R2_ACCESS_KEY_ID, R2_SECRET_ACCESS_KEY, and CF_ACCOUNT_ID are all set. The repo notes that R2 mounting only works in production, not wrangler dev.
Gateway fails to start
Run npx wrangler secret list and npx wrangler tail and verify your AI-provider configuration and gateway token are present.
WebSockets work poorly in local development
The repo documents limitations in wrangler dev with sandbox WebSocket proxying. Test against a real deployment if you need full browser or chat behavior.